🚪 Elevate your entryway game—because first impressions last!
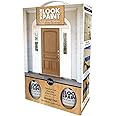
The Giani Wood Look Paint Kit in Honey Oak offers a professional-grade, fade-resistant wood grain finish designed for both interior and exterior doors. With a quick 4-hour cure time and a simple 3-step application, it’s compatible with steel, aluminum, and wood surfaces, delivering authentic style and durability that complements modern door hardware.


| Brand | Giani |
| Color | Honey Oak |
| Finish Type | Wood Grain Finish |
| Size | 16.91 Fl Oz (Pack of 1) |
| Item Volume | 500 Milliliters |
| Special Feature | Fade Resistant |
| Unit Count | 16.91 Fl Oz |
| Paint Type | Acrylic |
| Specific Uses For Product | Interior |
| Surface Recommendation | Metal |
| Indoor/Outdoor Usage | Outdoor |
| Item Form | Liquid |
| Included Components | •8 oz. Honey Oak Wood Tone Base Coat |
| Age Range (Description) | Adult |
| Is Waterproof | False |
| Model Name | Paint Kit |
| Package Information | Can |
| Color Code | #96612D |
| Full Cure Time | 4 Hours |
| Coverage | 40 |
| Water Resistance Level | Water Resistant |
| UPC | 856512007446 |
| Manufacturer | Giani |
| Part Number | FG-WL HON FDK |
| Item Weight | 3.27 pounds |
| Product Dimensions | 7 x 3 x 11 inches |
| Item model number | Wood Look |
| Is Discontinued By Manufacturer | No |
| Style | Front Door Kit |
| Finish | Wood Grain Finish |
| Item Package Quantity | 1 |
| Special Features | Fade Resistant |
| Batteries Included? | No |
| Batteries Required? | No |
F**8
Fantastic
Omg! This product is the BEST! I redid my steel door and the wood around it. My door turned out awesome. It is very easy to use. Just follow the directions. The paint quality is very nice. It doesn't have a glow! Very easy to clean up. It does dry fast. In my opinion, this is the next best thing to teal wood look.
R**L
Works great, if you take your time!!!!!!
I went off on a limb and purchased this kit in an attemp to make my garage doors for our new pole barn look like wood. I purchased the English Oak kit in an attempt to get a grainy wood tone look, with some depth. I cleansed the door first with some soap and water and scrubbed it with an automotive car cleaning brush. I allowed to completely dry. I taped off the windows. I then applied the base coat of paint. Note, if you apply only this coat on one day and wait to do the gel, you may receive odd comments! ( my neighbors did tell me they were "concerned" with the color of the base coat! HAHA!!!!) This goes on well and easy. I let dry and then touched up a few spots that I could still see white through. I then moved to the application of the stain. I placd the garage door at an easy to work at level, and started by using a hard bristoled paint brush to get the gel stain into the corners of a sqaure. I then came in immediately after with the mitt (I folded to make it smaller and easier to hold). I worked one small square at a time, making sure to only use even pressure in one direction- horizontal. Also, do not "over do" it with brushing or stroking the stain. The first coat of the stain will not look great at all once on. You WILL question "what in the world was I thinking!?" Take a deep breath and keep going!!!! Allow the first coat to dry completely. Note, it DRIES FAST! I then used just the mitt folded and applied the second coat of stain, working it just as the first coat. Allow to dry completely. Then step back and ENJOY your new look of your door. We have completed two doors and they all look great! Have fun!!!!
J**A
Beautiful!
We are getting new siding and wanted to update our garage door color without having to shell out the money for new ones. This kit came with everything needed (which made the project so much easier!). I read the instructions and watched the instructional video on their website and got to work. The process was pretty easy but the outcome was better than I expected! Our doors already had a faux-wood texture- I only applied 1 coat of the base and 1 coat of the 2nd step (and just went back in to fill in some spots I missed or didn’t apply evenly) but overall I was very impressed with the outcome. I was able to complete 2 garage doors with plenty of product left over. I highly recommend!
M**N
Unsure but the neighbors love it!
Started from the bottom now we’re here… actually started w your basic white garage door, then did the primer, then I did 3 coats because I did not like what it looked liked after the first two. I’m not a fan of it up close, but woowee from the street she looks good!!I totally bought the wrong color. I should have went with honey oak vs English oak but I thought my front door was English Oak. I was WRONG! It still doesn’t look too bad. It complements the trim on the home and if it really bothers me I can always stain the door darker. It’s not that serious.The project took maybe 4 hours to complete. My white door was super dirty so cleaning it took a little time. The paint goes on super easy with great adhesion! I did use the mit. I folded it into a square vs putting it on my hand. I was nervous as hell when I started but quickly realized my door had the grooves so I slapped it on and kept moving! It was approx 65 degrees out, garage door shaded, so the stain didn’t dry too fast for me. I did work in small sections as suggested though strictly out of fear from all the other reviews. Once I did the first stain, I dropped the mit in a bowl of water, set the timer, and repeated. Don’t be scared you are going to put too much on, with the mit being damp it really helps spread the stain. Also, if you don’t like the way it looks after the first couple times, keep going to achieve the look you are going for!I’m satisfied with the end results. My neighbors are extremely satisfied with the end results! I get a ton of complements on my “new garage door.” Just goes to show sometimes we are our own worst critics.Lastly, I was VERY pleased with the kit in its entirety! Has everything you need to complete the project except a paint tray. Worth every penny!DIY rating = easy & fun!
Trustpilot
4 days ago
2 weeks ago